
Setup & how it works
Finex Business user guide
From a free account to your first GST invoice, stock update and live store. Follow the screens in order — no card, no install.
- Step 01
Start on Finex Business
Open Finex Business in your browser. This is the product for GST billing, inventory, services and a live store or showcase. FinEx Personal (the expense app) is separate.
- Works in Chrome, Edge or Safari on Windows and Mac.
- No app install and no credit card.
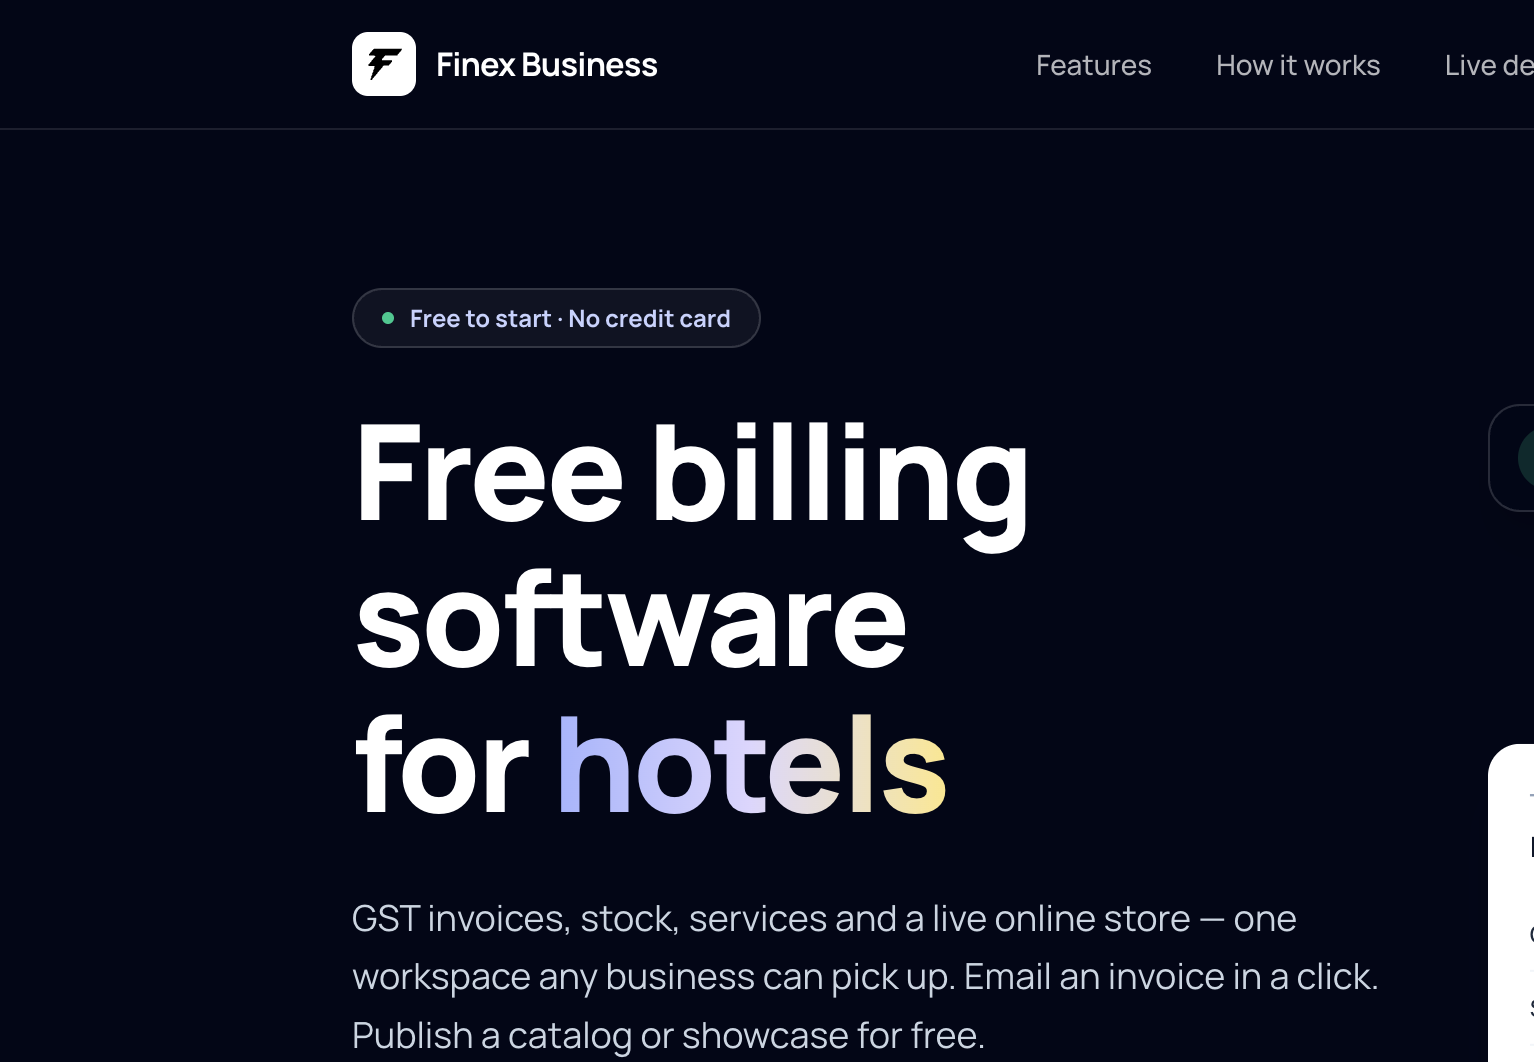
Finex Business homepage — free GST billing, inventory and a live store. - Step 02
Create your free account
Click Start free or Create free account. Enter your name, work email and a password. Finex sends a 6-digit code to that inbox.
- Use an email you can open — the code expires.
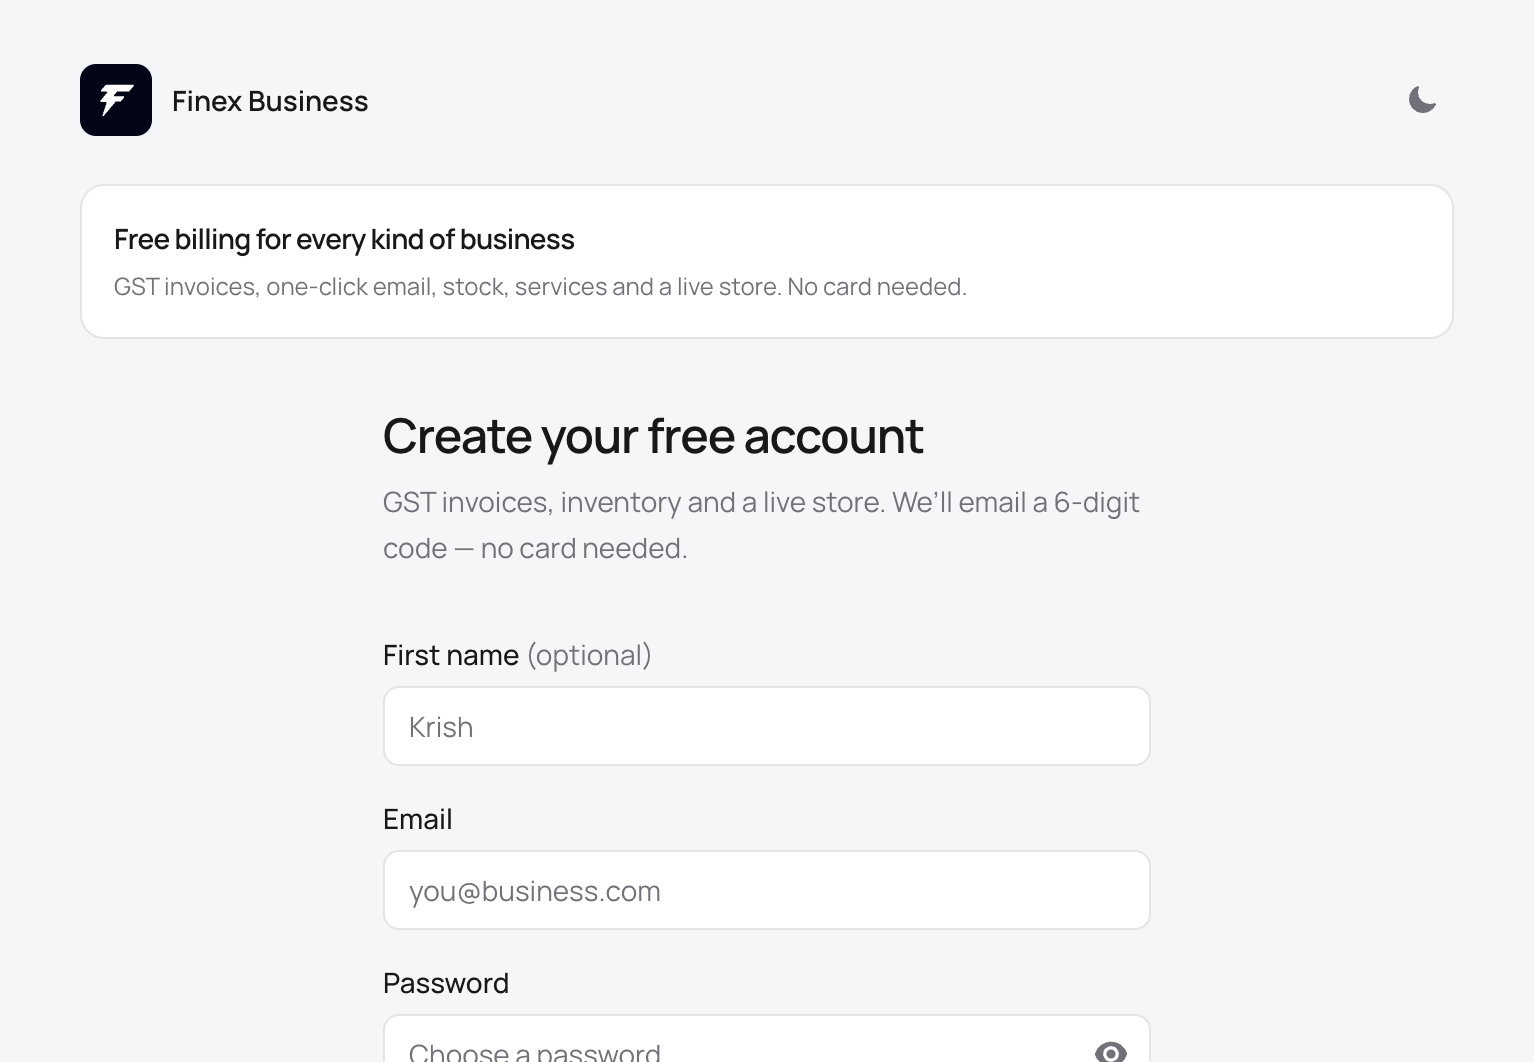
Create account — name, work email and password. No card. - Step 03
Sign in next time
After you verify, you land in the workspace. Next visits use Sign in with the same email and password. Forgot password sends a reset link to your inbox.
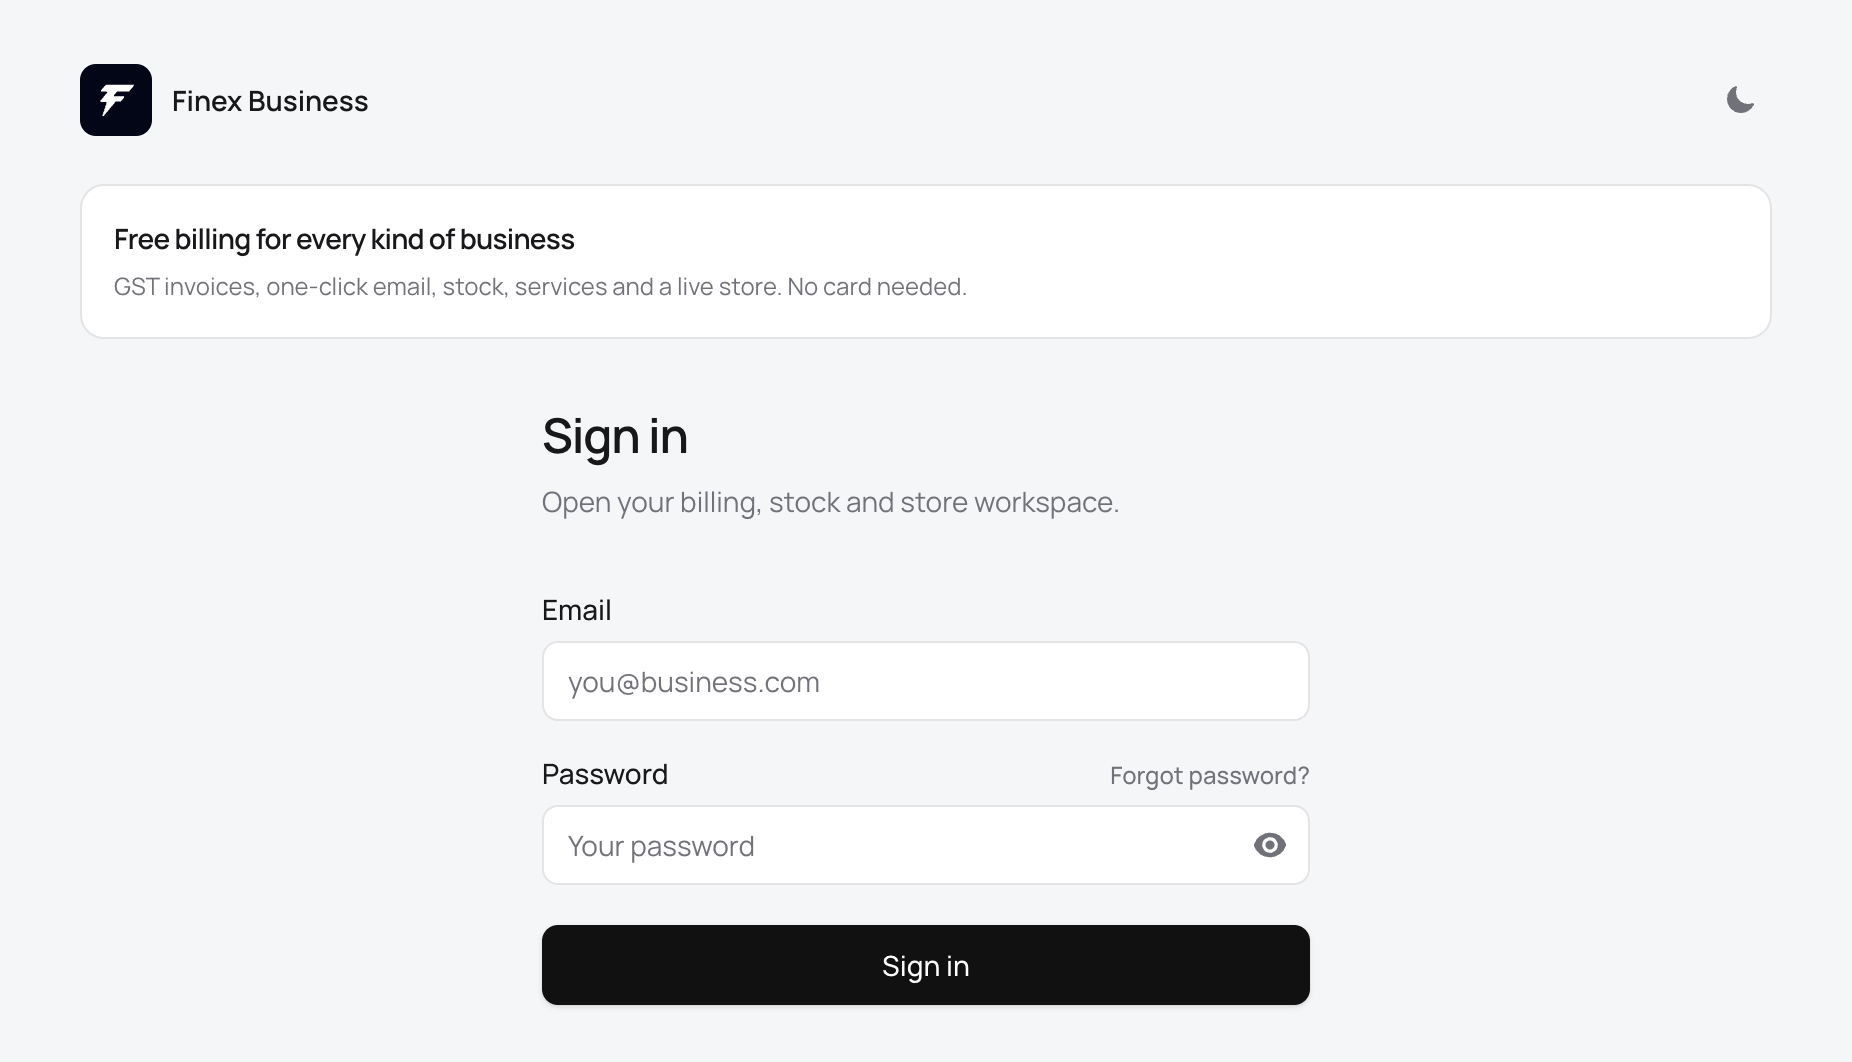
Sign in with the email you registered. - Step 04
Pick your kind of business
First-time setup asks what you run — retail, clinic, restaurant, rental, transport and more. This switches the words you see (Customers vs Patients, Invoices vs Bills), the default pricing, and which modules appear. You can change it later under Settings → Type & wording.
- Retail starts with products and stock.
- Clinics and studios start with services and procedures.
- You can still add both goods and services in the same catalog.
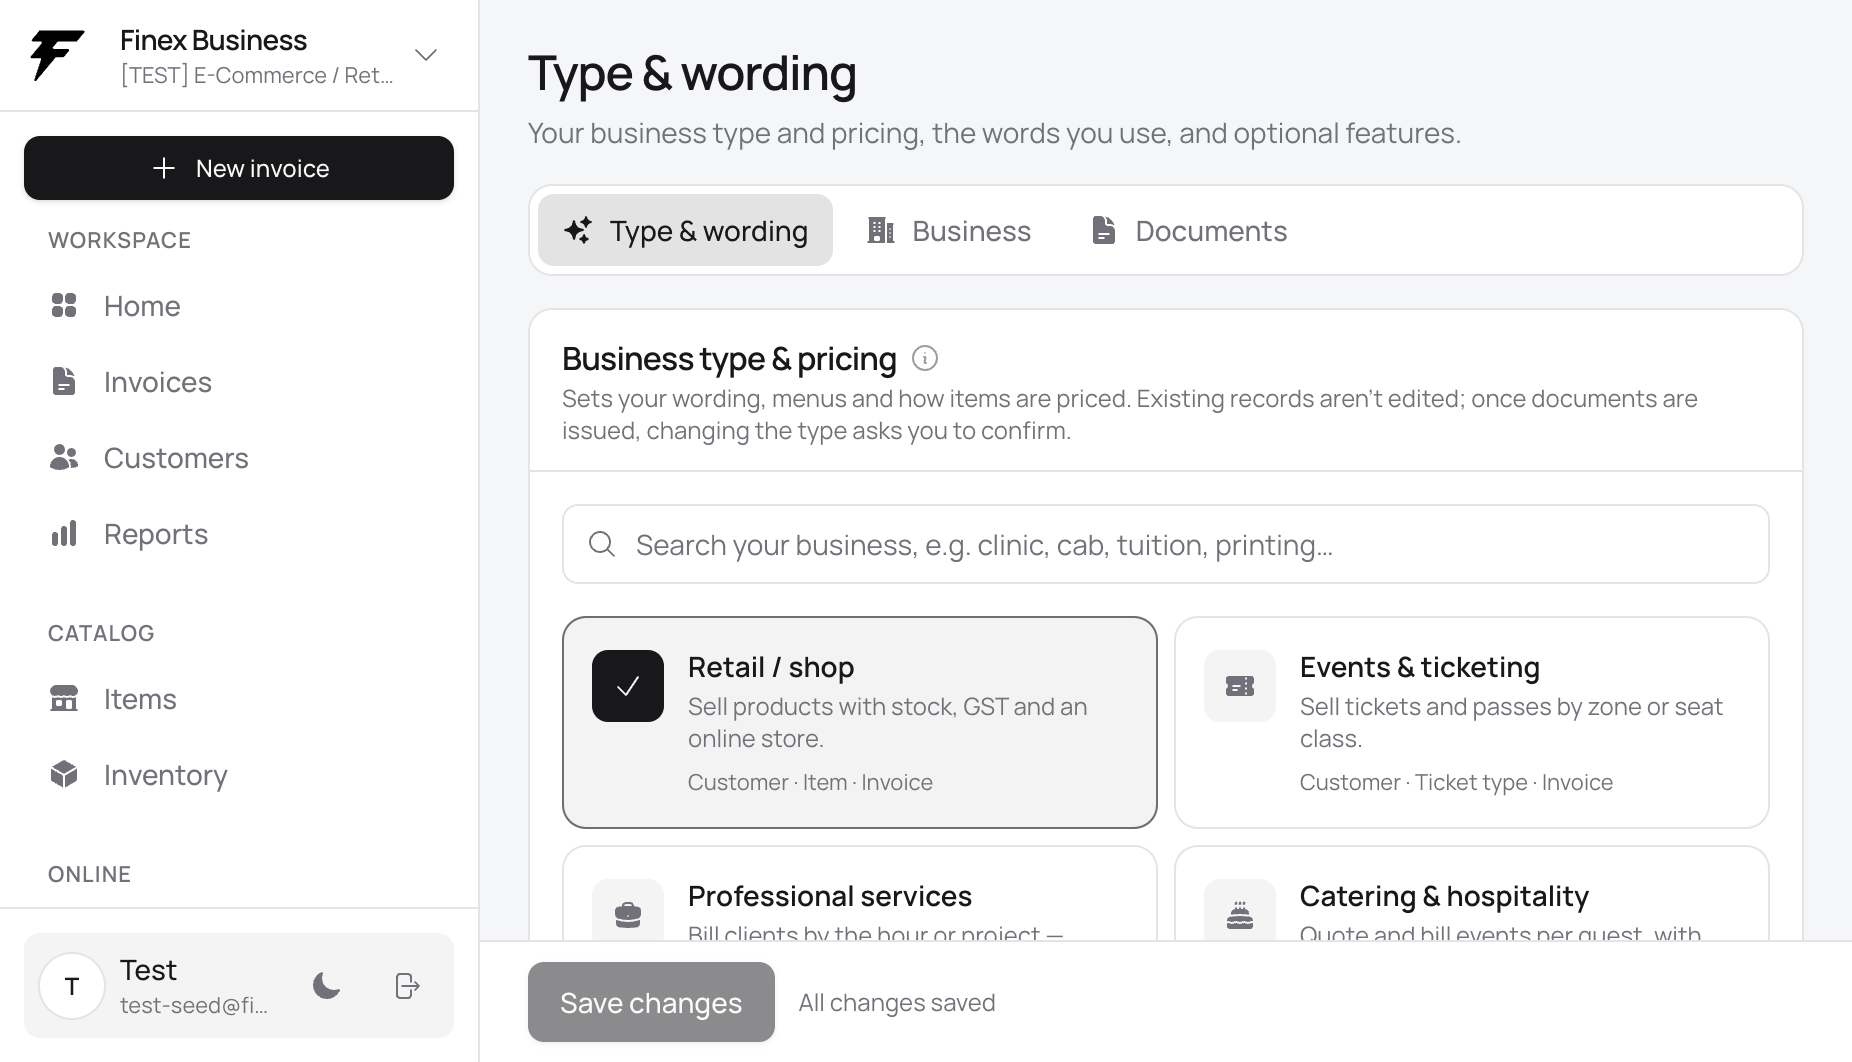
Business type picker — Finex matches wording, fields and invoices to how you work. - Step 05
Add GST and business details
Step two of setup is your display name, legal name, GSTIN, state (place of supply), city and invoice prefix. State drives CGST+SGST vs IGST on every invoice. Prefix becomes the start of numbers like INV-2026-27-0001.
- GSTIN is optional if you are not registered yet.
- Legal name should match your GST certificate.
- You can fill bank details and extra address later in Settings.
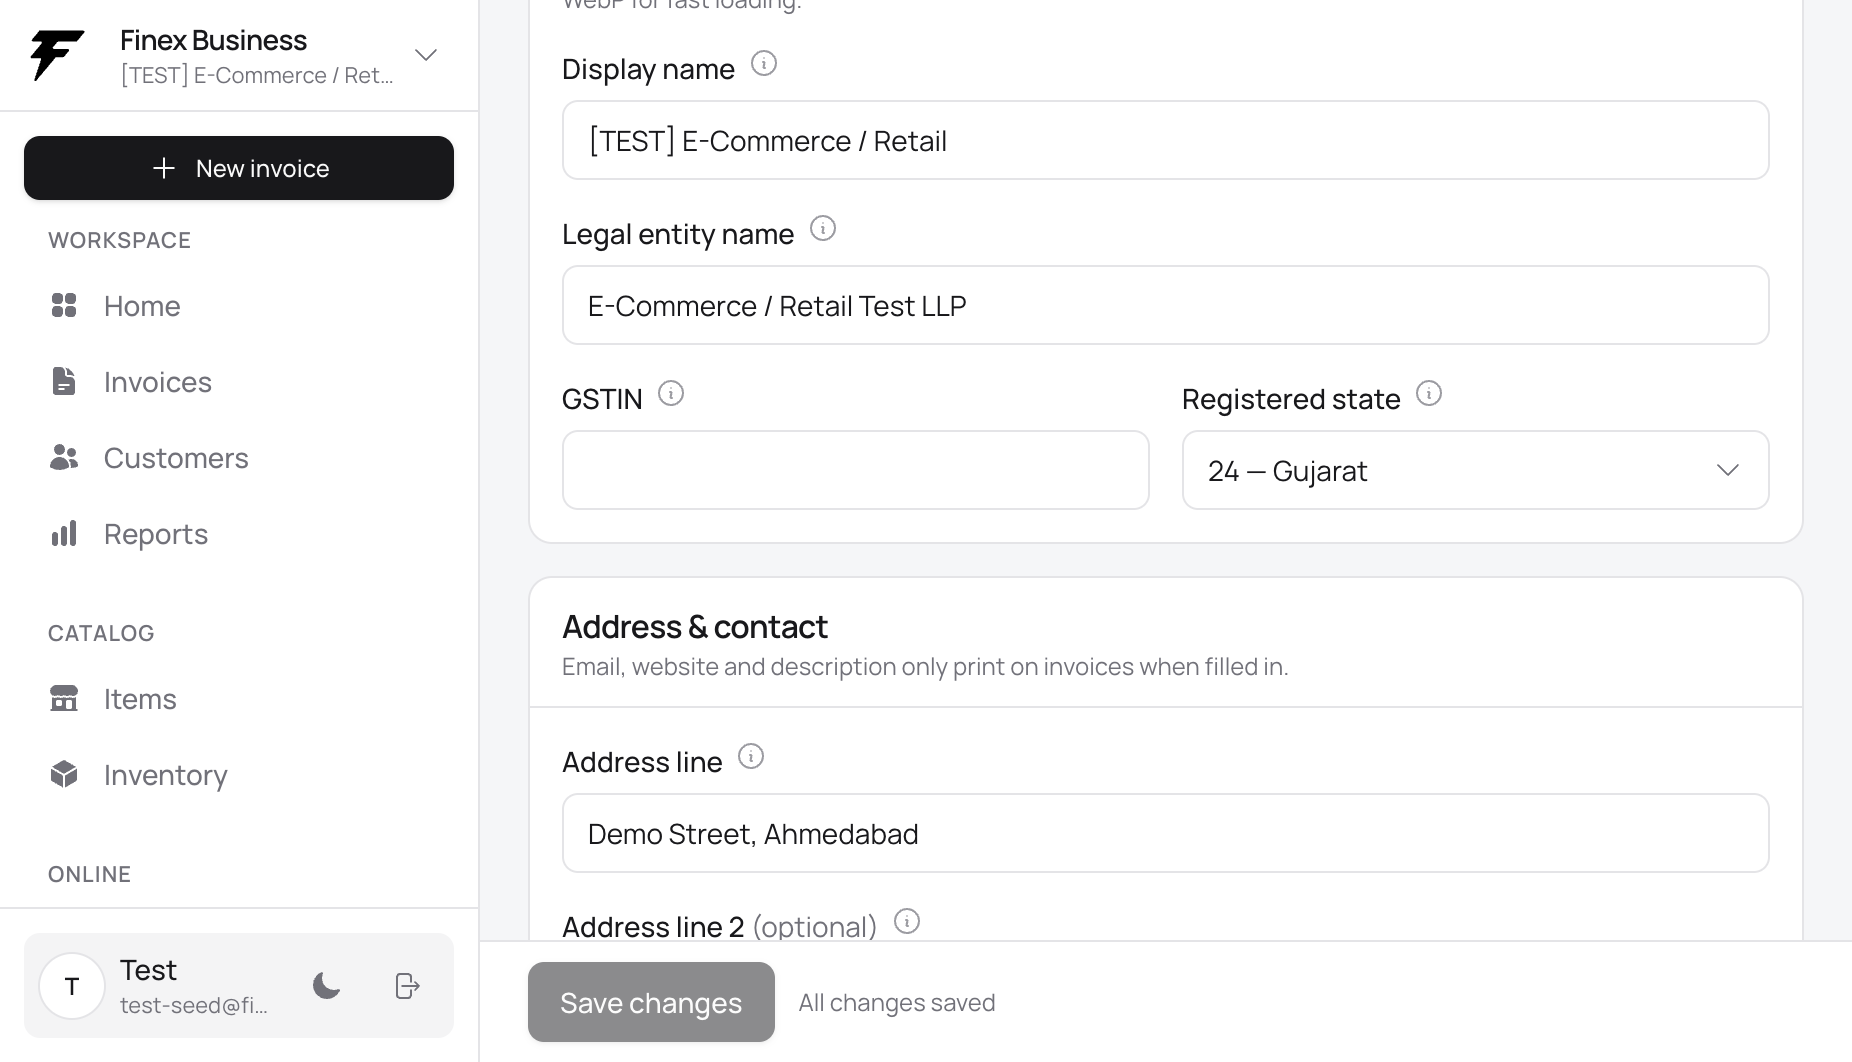
GST, state and invoice prefix — used on every tax invoice. - Step 06
Your workspace
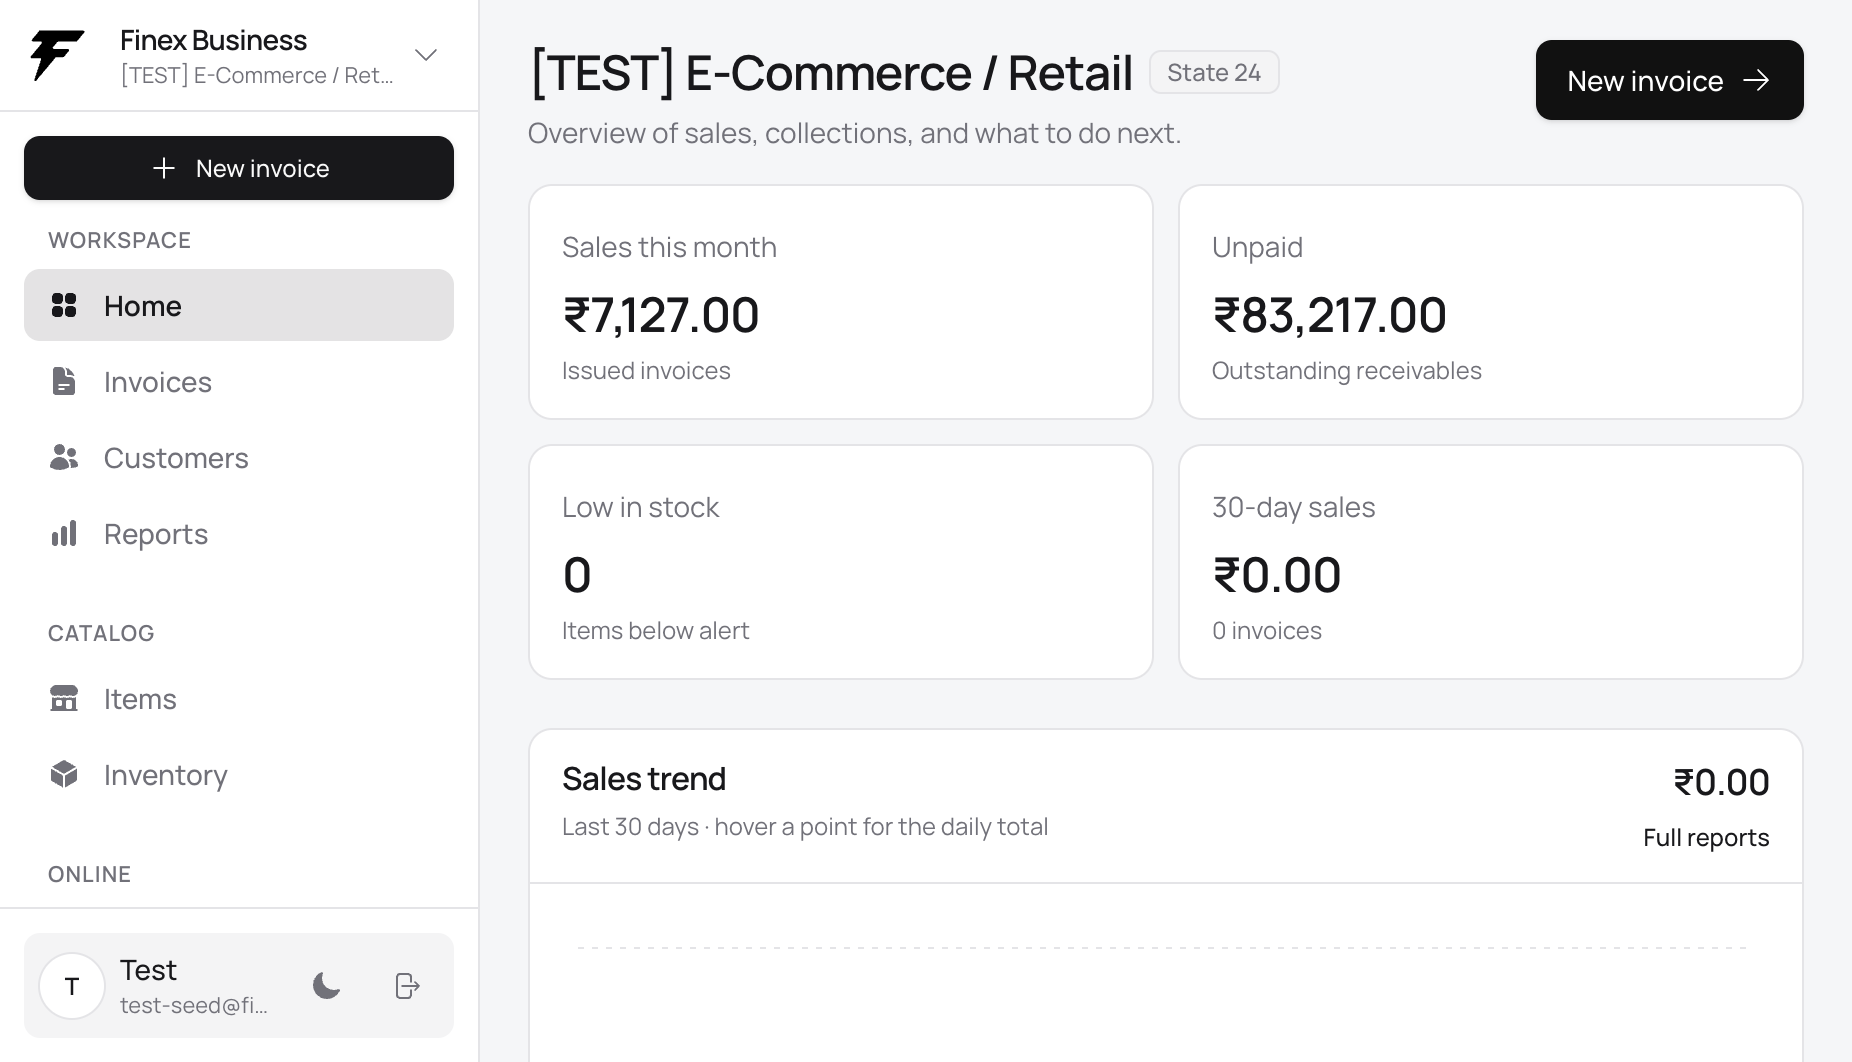
After setup you land on Home. Sales, unpaid totals and low stock sit at the top. The left sidebar is the whole product: invoices, customers, catalog, inventory, online store, reports and settings. New invoice is the fastest way to bill.
- Use the search and date filter to find a bill.
- Tabs switch Invoices, Quotes and Credit notes when your business type uses them.
- Send, print and download sit on each row once an invoice exists.
Invoice list — status, totals, and one-click email, print or download. - Step 07
Add what you sell
Open Catalog and add products, services or both. Each item has a name, price, GST rate and a pricing model (per piece, per hour, per day, per km, and so on). The same items appear on invoices, in stock and on your live store.
- Turn on “show on my online store” when you want the item public.
- Cost price stays private — it never prints or publishes.
- Import a CSV if you already have a list.
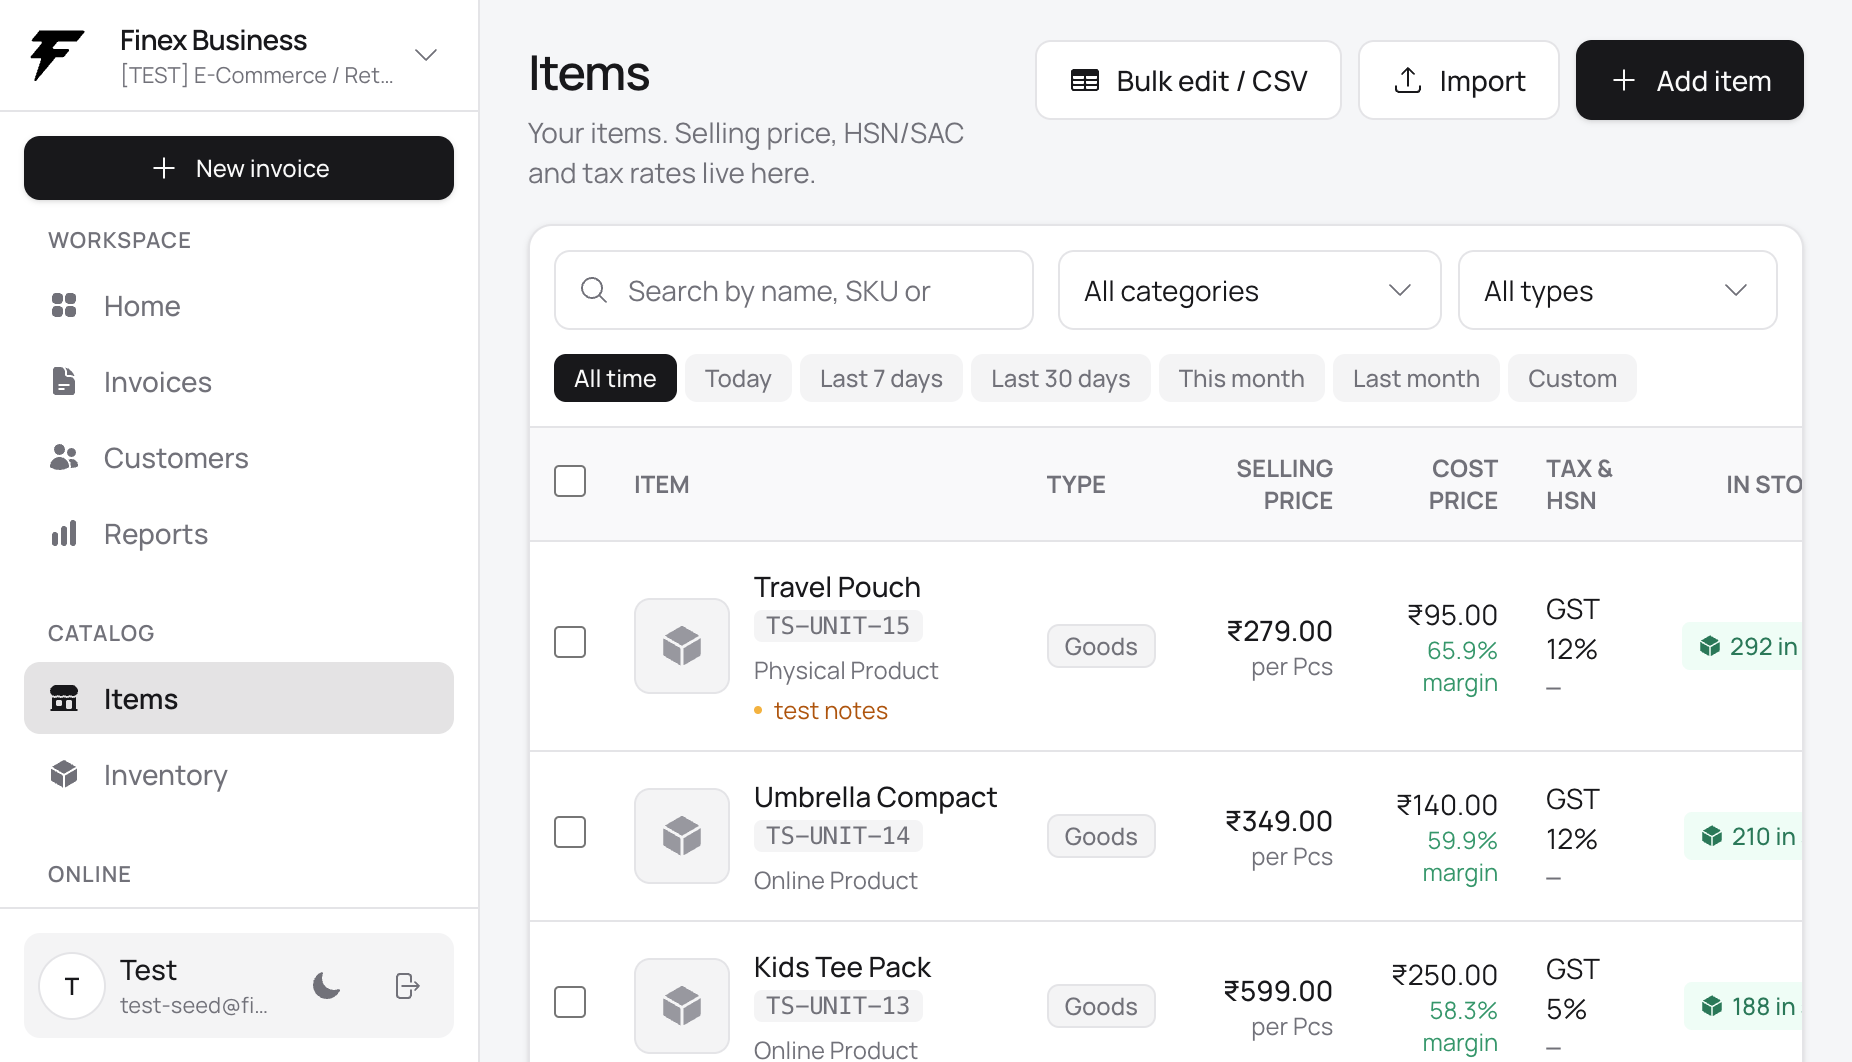
Catalog — goods and services that power invoices, stock and the website. - Step 08
Save your customers
Open Parties (or Customers / Patients, depending on your type). Save name, billing state, GSTIN and email once. Finex reuses them on every invoice and on one-click email.
- State on the customer decides intra- vs inter-state GST.
- Email is what one-click send uses — add it if you want to email bills.
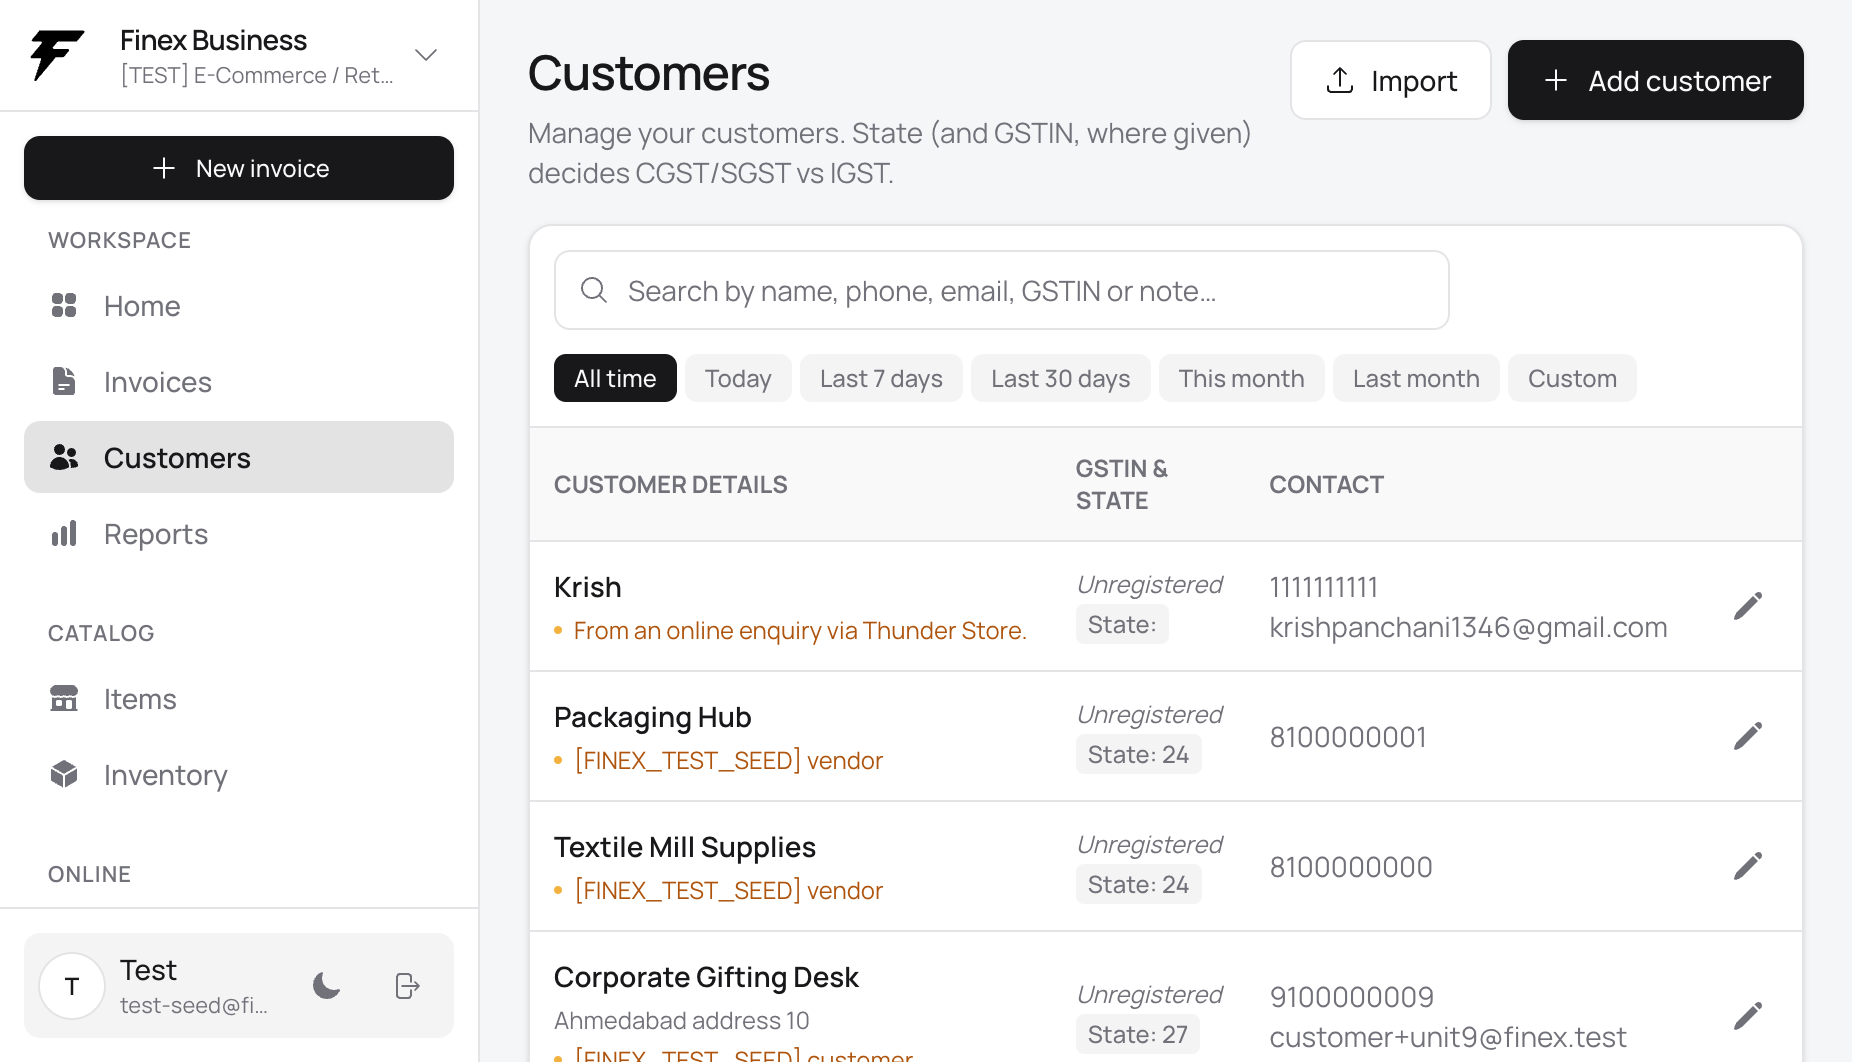
Customer records with GSTIN, state and email. - Step 09
Create a GST invoice
Click New invoice. Pick a customer, add lines from your catalog, and Finex splits CGST+SGST or IGST from place of supply. You can add charges or discounts, notes, and payment mode before you save.
- Search the catalog to add a line — no retyping prices.
- Change qty or rate on the line; tax recalculates.
- Save as a quote first if your type uses quotes.
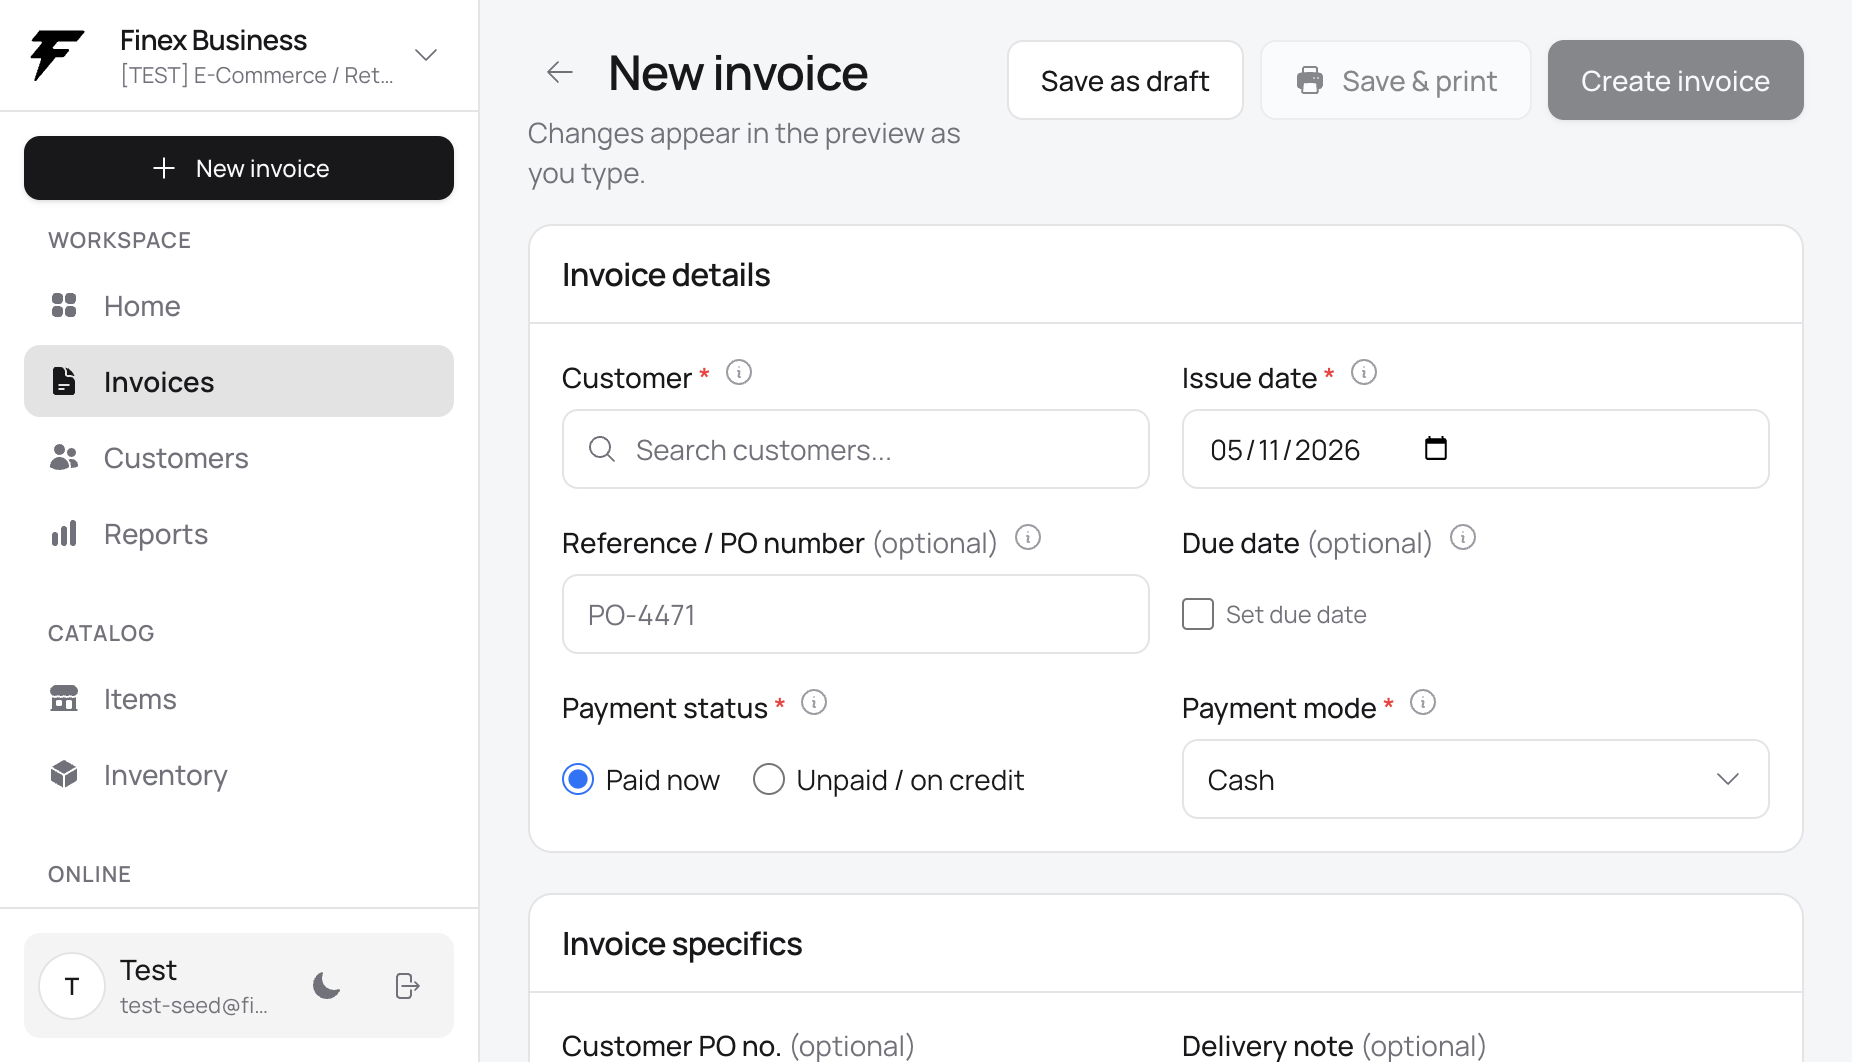
Invoice editor — customer, catalog lines and automatic GST. - Step 10
Send, print or download
Open the saved invoice. Email sends a clean message from your business name with the PDF attached. Print and Download sit next to Send on the list and on the preview.
- The customer’s saved email is used automatically.
- You can resend after you edit.
- Print layout is always a light page, even if you use dark mode.
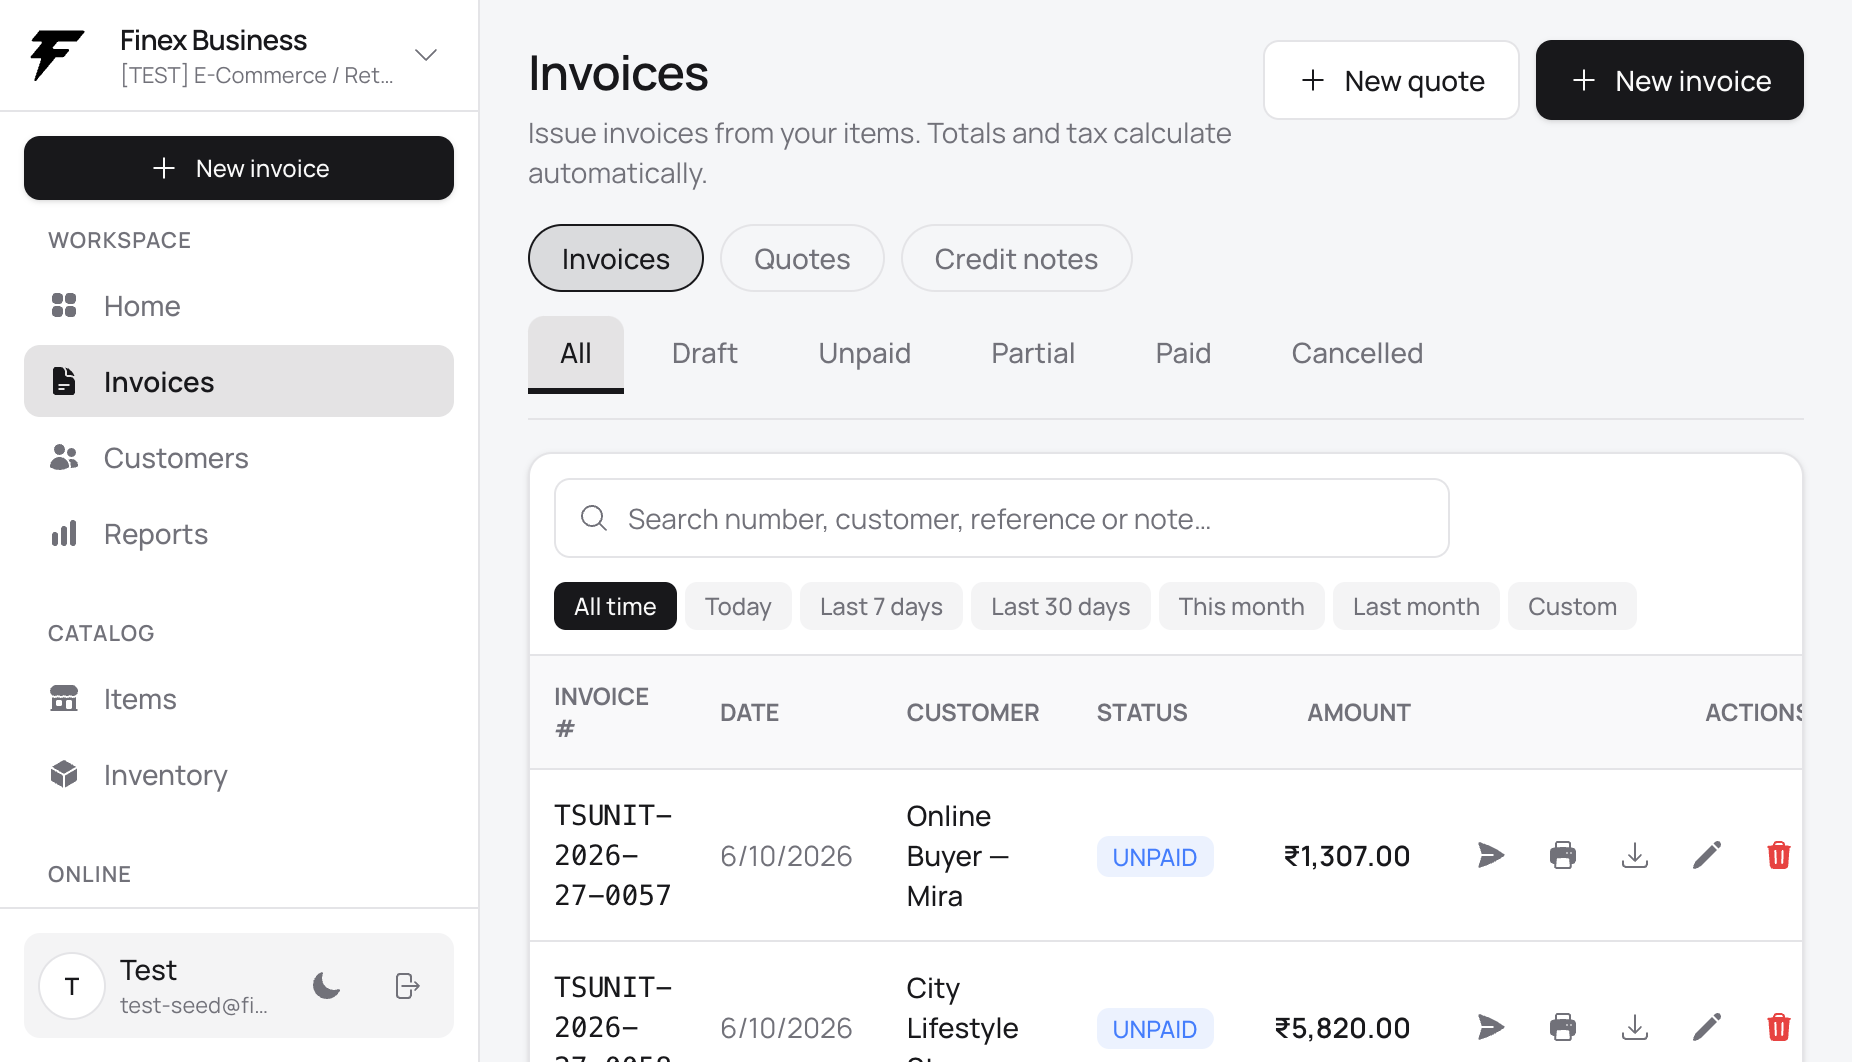
Invoice list — email, print and download sit on every row. - Step 11
Record a payment
Shops mark Paid now or Unpaid on the invoice itself — choose UPI, cash, card or bank. Home shows what is still due. Rentals and clinics also get an Advances & deposits page; a shop is sent back to invoices.
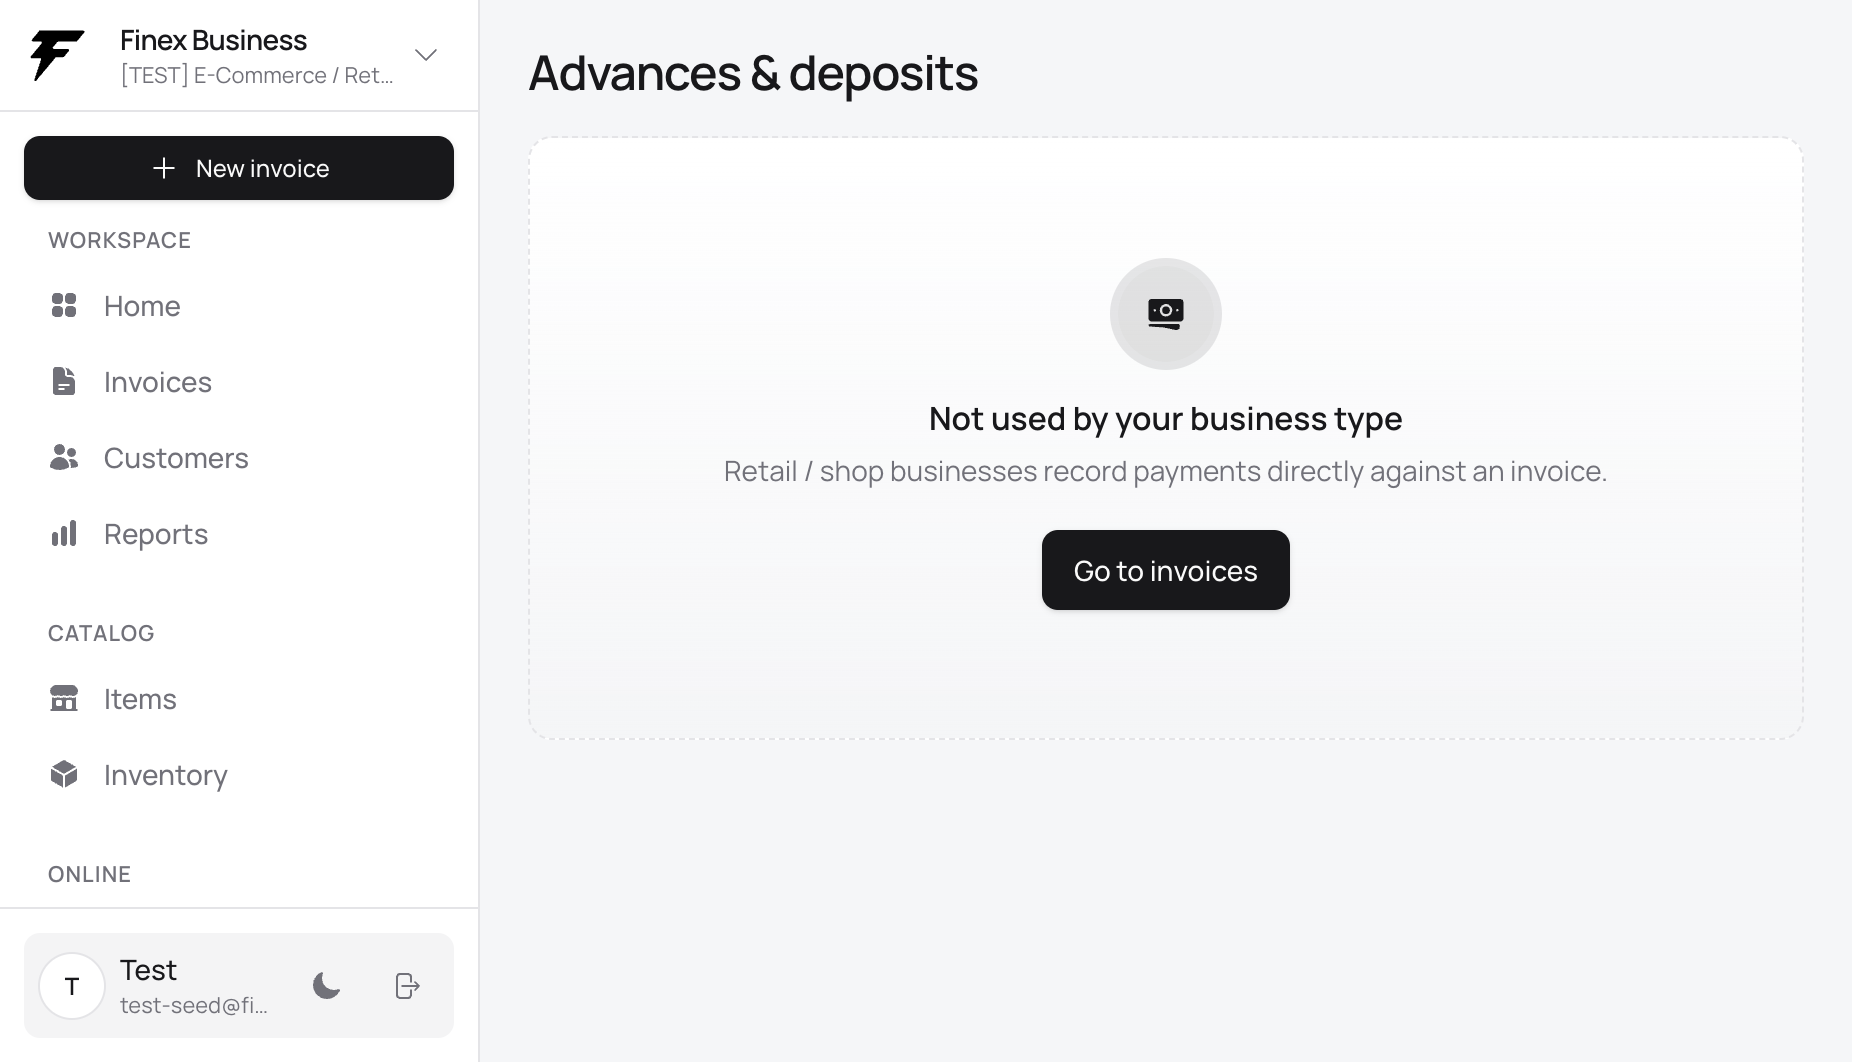
Retail records payment on the invoice. Other types get advances and deposits. - Step 12
Keep stock in step
For product-led businesses, Inventory shows on-hand quantities. Selling on an invoice takes stock off the shelf. Use an adjustment when you count, receive a purchase, or write off damage. Low-stock items are flagged.
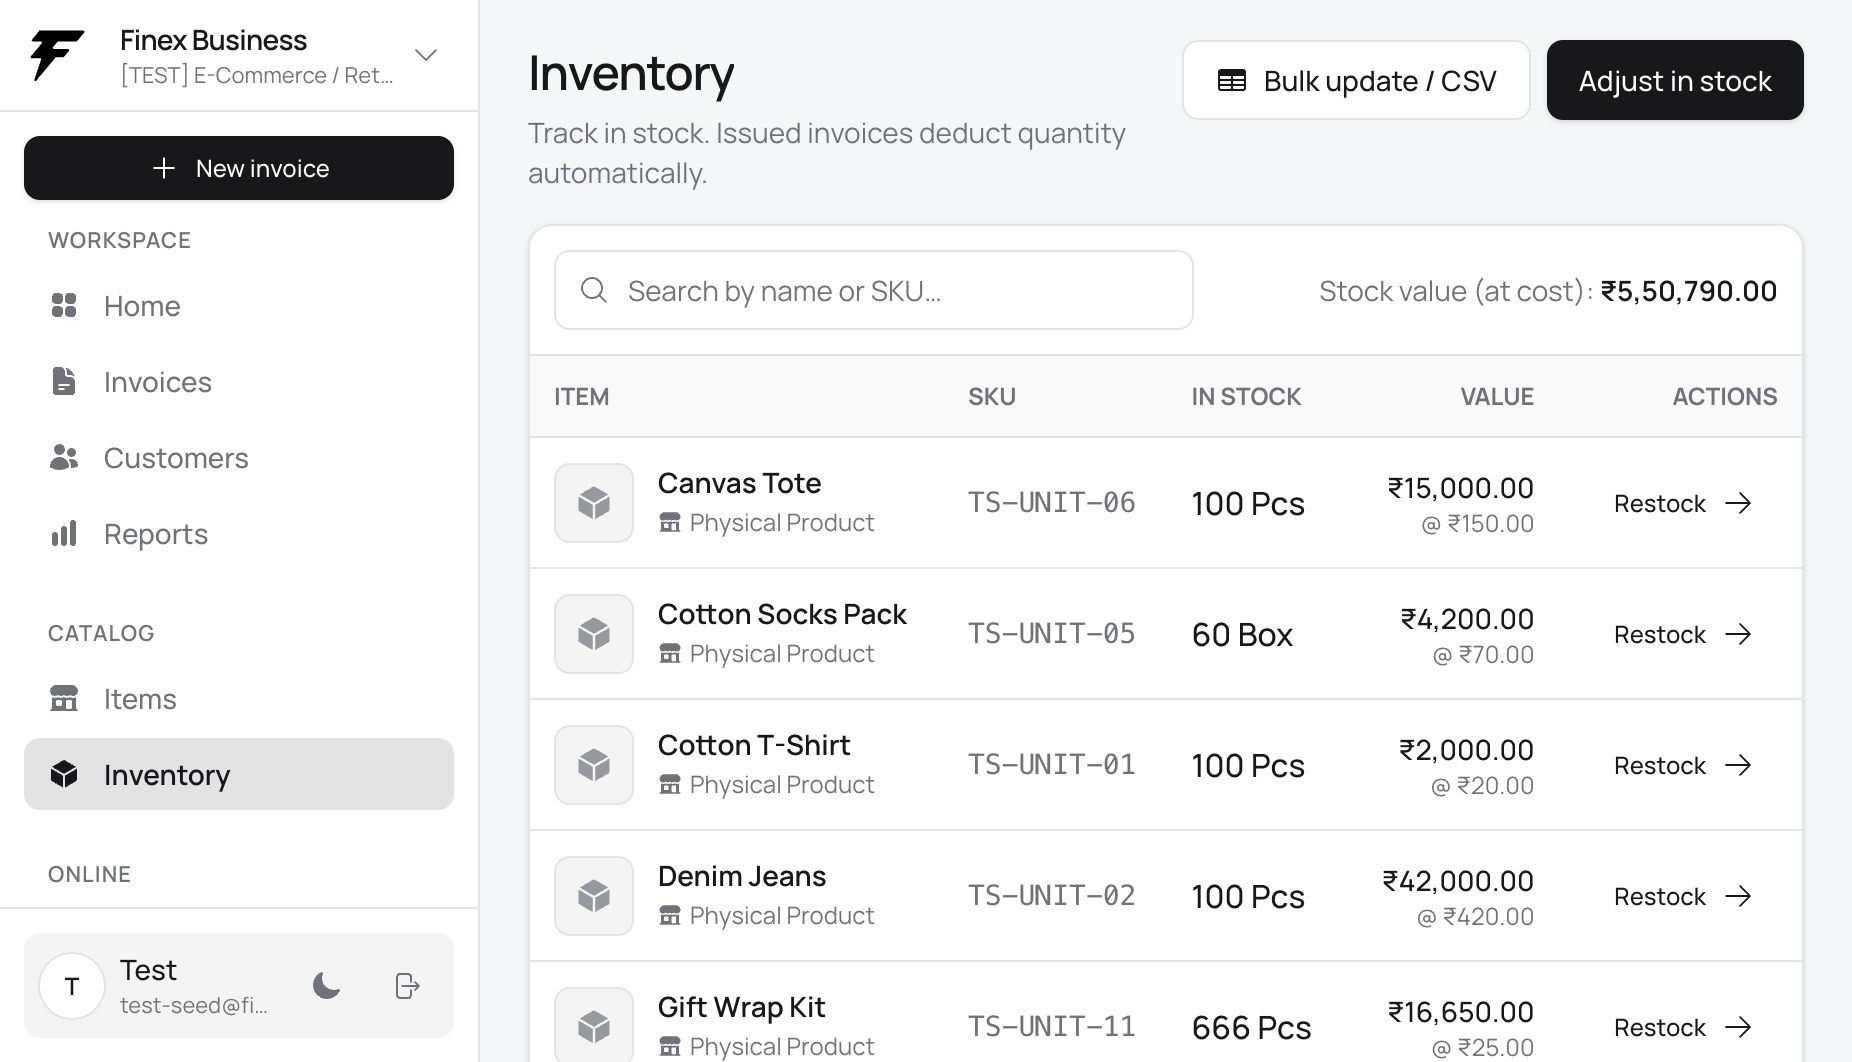
Inventory — on-hand qty that follows every sale. - Step 13
Publish your store or showcase
Open Online, create a site, pick a template and choose which catalog items to show. Publish at your own web address. Share the link or QR from the counter. Enquiries and WhatsApp messages land back in Finex.
- Cost prices and internal notes never go public.
- Update an item once — invoices and the website stay together.
- A draft stays private until you click Publish.
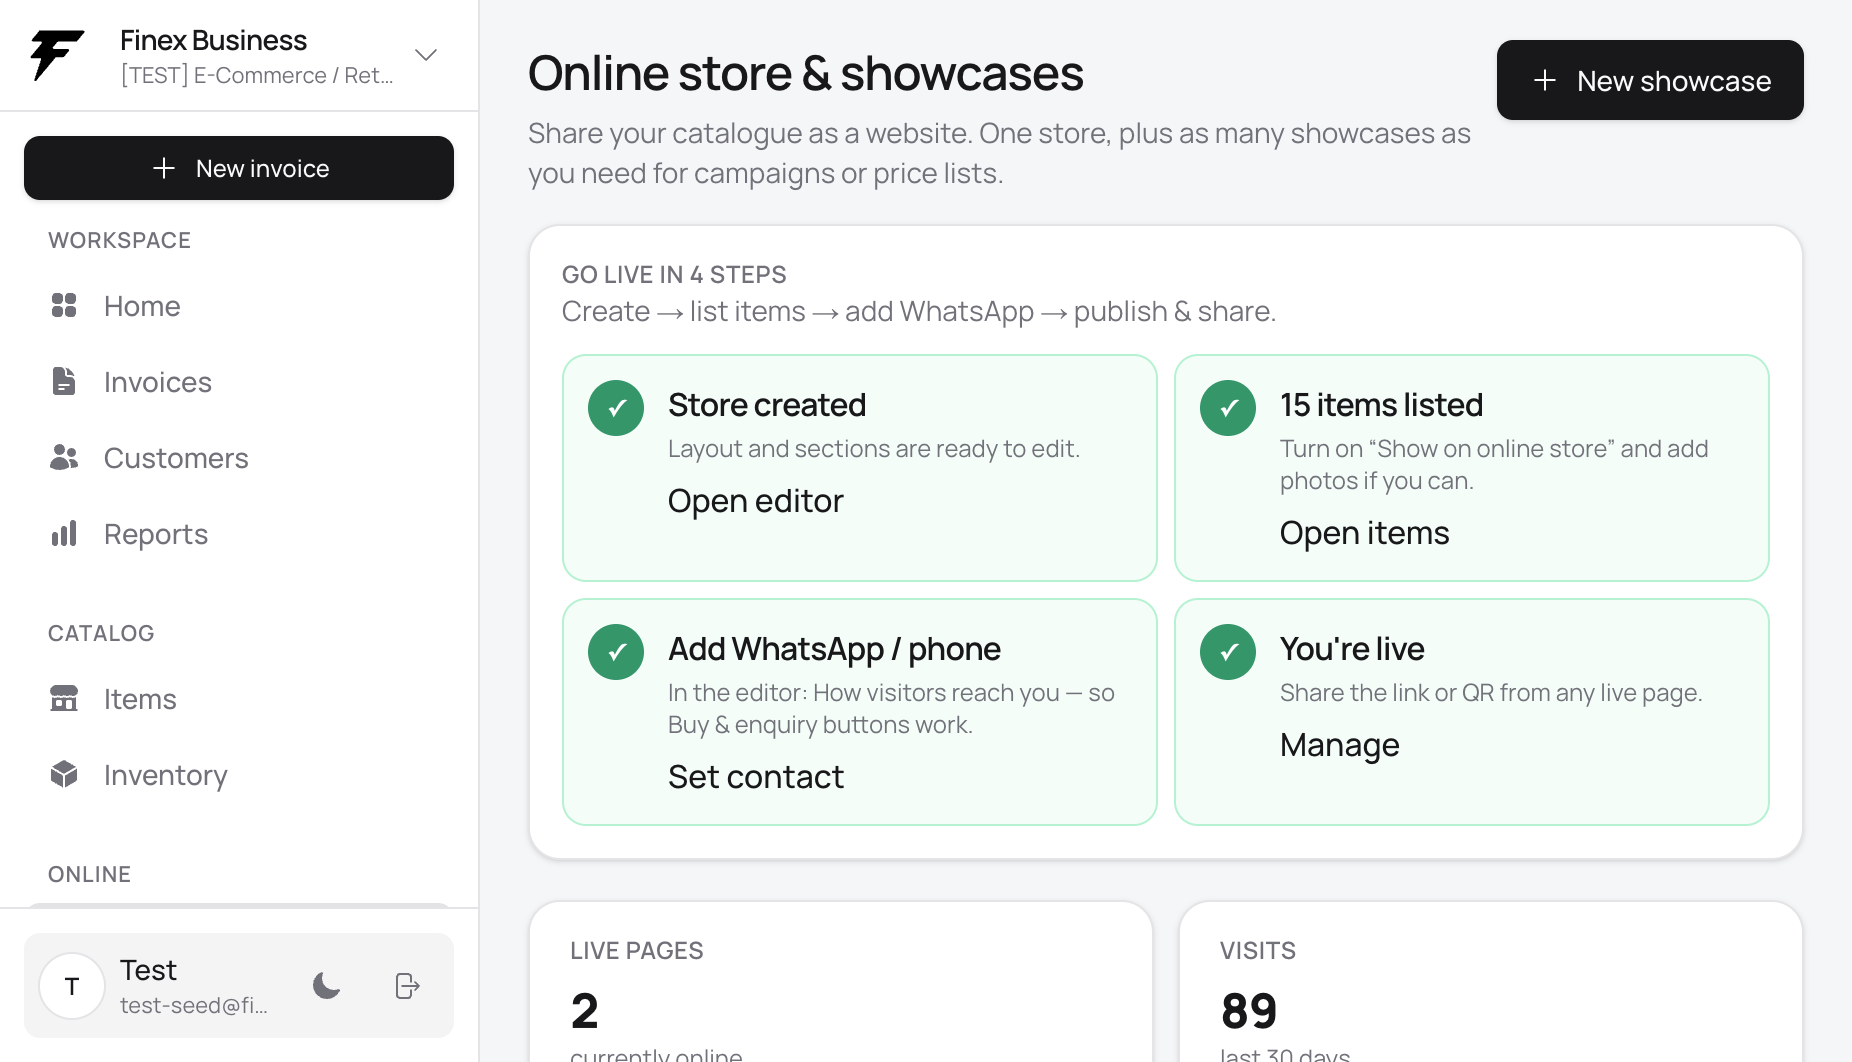
Online — a free store, catalog or service showcase from the same items. - Step 14
Reports and settings
Reports show sales, receivables and tax for a date range, with CSV or PDF export. Settings is where you change business type, GST, invoice design, team, charges and extra fields. Help & Support is at the bottom of the sidebar if you get stuck.
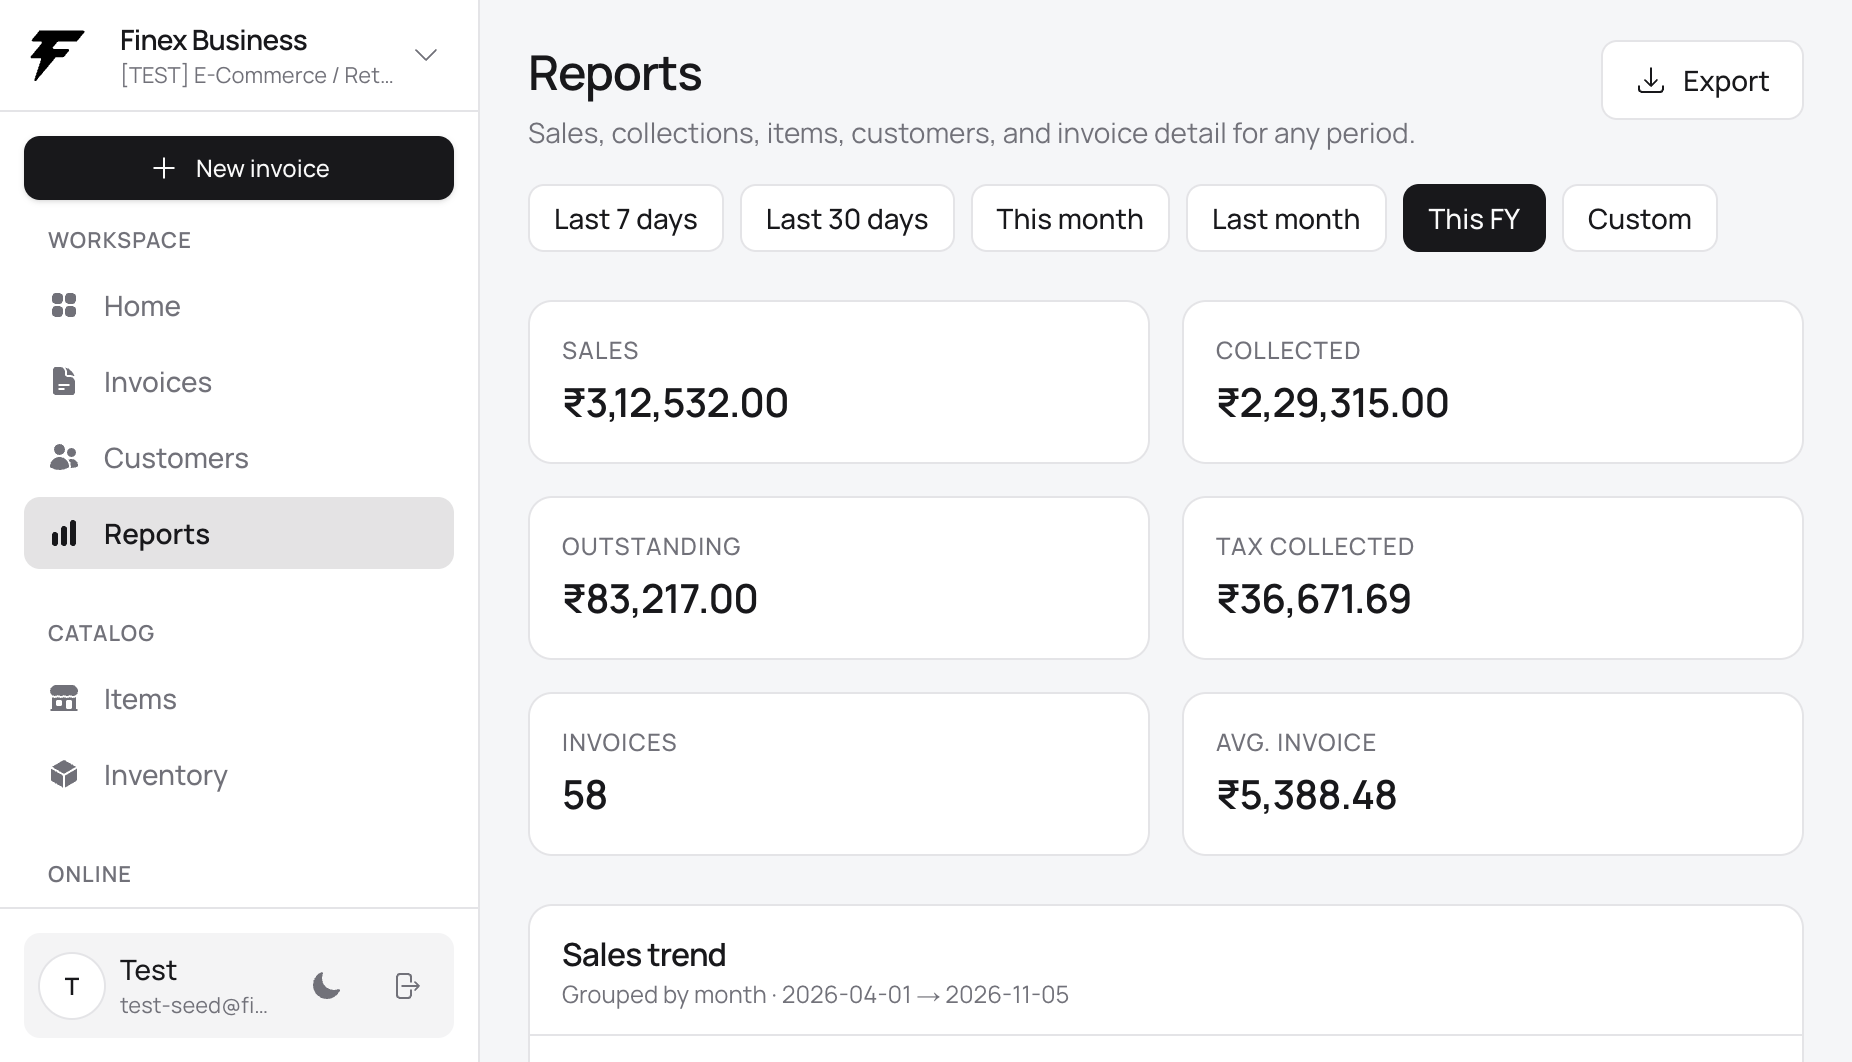
Reports — sales, tax and receivables you can export.
Questions
While you set up
Do I need to finish every step before I can bill?
No. After you pick a business type and save a name and state, you can create an invoice. Add catalog items and customers as you go — or type a one-off line.
Can I change my business type later?
Yes. Settings → Type & wording. Finex updates labels and defaults. Existing invoices stay as they were.
Is the online store required?
No. Many shops only use billing and stock. Publish a store or showcase when you want a public link or QR.
Prefer a short overview? How it works · Live demo
Free forever to start
Ready to try it on your own catalog?
Create a free account and follow the same screens you just saw.